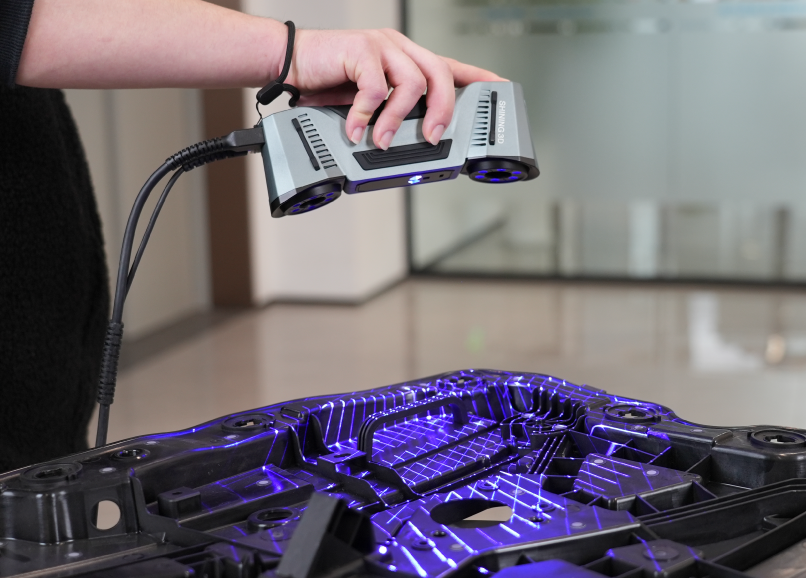
Plastic injection manufacturers face increasing geometric complexity: thin ribs, organic freeform surfaces, and multi‑feature assemblies that challenge conventional quality control. Relying solely on pointwise tools delays detection of functional deviations and drives costly rework and mold iterations. Integrating 3D scanning into the inspection chain turns subjective sampling into an objective, repeatable engineering inspection that directly compares manufactured parts to CAD intent.

Plastic injection manufacturers face increasing geometric complexity: thin ribs, organic freeform surfaces, and multi‑feature assemblies that challenge conventional quality control. Relying solely on pointwise tools delays detection of functional deviations and drives costly rework and mold iterations. Integrating 3D scanning into the inspection chain turns subjective sampling into objective, repeatable engineering inspection that directly compares manufactured parts to CAD intent.
Limitations of Traditional Measurement (CMM, Calipers) on Complex Shapes
Coordinate Measuring Machines (CMMs) and hand calipers remain indispensable for dimensional measurement of datum features and simple geometries, but they are inherently sampling technologies. For freeform surfaces and deep cavities, probe‑based CMM inspection requires careful sampling strategies and often captures only a small fraction of the surface; academic and industrial studies show adaptive sampling is necessary to approach acceptable coverage, and even then probe access and stylus radius limit detection of local surface anomalies. Practically, this means a CMM program can miss localized warpage, sink marks, or draft‑angle deviations that affect assembly or sealing—errors that a full‑surface scan would reveal.
Engineering Inspection: Scan‑to‑CAD Comparison and GD&T on Surfaces
A robust engineering inspection workflow aligns the scanned point cloud or mesh to the CAD reference (scan‑to‑CAD), using datum‑based or best‑fit strategies, then extracts surface deviations and feature geometry. This enables engineers to apply GD&T principles not only to isolated points but to entire surfaces and feature families, improving interpretation of functional nonconformities (e.g., flatness over a sealing face, perpendicularity of boss arrays). In production contexts, scan‑to‑CAD reduces analysis time for failure investigations and supports faster decisions on whether deviations stem from mold wear, material shrinkage, or process drift.
Color Map: Interpreting Surface Deviations Relative to Tolerances
The color map (deviation map) is the primary visualization for full‑surface inspection: it encodes signed deviations between the manufactured surface and the CAD nominal within a chosen tolerance band. Reading a color map requires distinguishing pattern types: uniform offset (global shrinkage), gradient (thermal or cooling imbalance), and localized peaks (mold damage or ejector interference). Properly configured color maps let teams separate deviations within tolerance from those requiring corrective action; in practice, switching from spot checks to color‑map‑driven inspection has reduced rework and inspection cycle costs in many shops by measurable margins.
Practical Impact: Metrics, Examples, and ROI
From field reports and vendor analyses, 3D scanning can capture surface detail down to a few hundredths of a millimeter and enable inspection coverage of 100% of the visible surface, compared with typical CMM sampling that may cover only a few percent of complex parts in routine plans. Case studies indicate that adopting full‑surface scanning for first‑article inspection and periodic sampling can cut downstream rework and mold correction cycles by 20–40%, and reduce scrap and inspection labor through automation. For example, a pilot program that replaced manual caliper checks on a complex automotive trim part with scan‑based inspection reported a 30% reduction in mold iteration time and faster root‑cause
Implementation Considerations for Production Floors
To realize these gains, manufacturers must: (1) define datum strategies that map to functional assembly; (2) set tolerance bands and color‑map thresholds tied to GD&T callouts; (3) integrate scan data into SPC and corrective‑action loops; and (4) train metrology and process engineers to interpret surface patterns rather than single‑point deviations. Start with a controlled pilot on a high‑value, freeform part and codify the inspection plan into repeatable software templates.
Conclusion
Moving beyond traditional measurement to 3D scanning transforms quality control from point checks into a comprehensive engineering inspection. Full‑surface comparison to CAD, visualized through a color map and analyzed with GD&T thinking, exposes functional deviations earlier, reduces rework, and provides quantitative evidence for process or mold corrections. Practical next step: run a scan‑to‑CAD first‑article inspection on one representative freeform part, quantify the percentage and location of out‑of‑tolerance areas, and use that dataset to justify scaling scan‑based inspection across the production line.
